Friday, February 27, 2015

9 - A Party and A Room Design Part 1

It's been a long time , Islanders.  I was snowed-in then I was sick. I've had a death in the family and I've embarked on a new journey accepting some new clients and finalizing some personal goals of mine.  Today, as a matter of fact, is a snow day.  I'm home with these two people who know how to work my nerves unlike anyone else I've ever come in contact with.  Don't worry about me, I'm fine.  It's their safety that's in question, lol.

The past two Wordless Wednesday posts have been teasers.

First, there was Munch's birthday clue:


Did you figure it out?

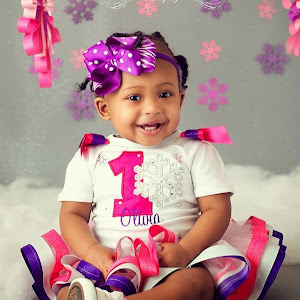
Munch has become obsessed with all things Paris.  We had our annual birthday discussion right after Valentine's Day (6 months out as usual) and Munch said she would like to have (and I quote), "a spa party... a Paris spa party!  *Like* with pink, black and white!"

Wednesday, February 25, 2015

WW: Craft Room Sneak Peek!


Photobucket

Monday, February 23, 2015

Maya Monday - Hope or Fear, Pick One.


Photobucket

Wednesday, February 18, 2015

WW: Munch's 9th Birthday Theme Clue

Photobucket

Sunday, February 15, 2015

Valentine's Day 2015

Today has been a great day, Islanders.  I knew it would be amazing when Munchface and I woke to goodies from Hubbs.  The highlight, for me atleast, was a card designed with me in mind!


A fro? Scalloped edges? Layers of fab cardstock and embellishments? I'm in love!

Friday, February 13, 2015

Preppin' for Valentine's Day

Howdy, Islanders!

I have been quiet lately and that, as you probably guessed, means I've been getting things done.  I've accepted some clients who require new services and support.  More on that later... I've also been checking things off my house list.  I updated the entryway:

Monday, February 9, 2015

Maya Mondays - Like Yours... Like Mine


Photobucket

Friday, February 6, 2015

Frugal Friday - The Flower Loot

During one of my recent shopping trips with Mom, I hit the jackpot!


We were in Goodwill when I noticed some of the artificial floral arrangements above a rack of clothing.  I grabbed a single branch of fabulous life-like artificial flowers in search of its price.  There wasn't a price.  Odd.  I pulled another bunch from the box.  Again, no price.

I looked on the box and noticed several price tags.  All of them read the same and I was almost certain it wasn't for the box... maybe for each stem?  It was a little pricey for each individual stem but I just held up a branch with the the tags still on it so I know most sell for more than that sticker in retail shops. Surely, that price isn't for the box.  It can't be true.  I asked the friendly sales associate to confirm the price with a manager.

While she disappeared to the back, I wiggled and happy danced in front of with mom to rub it in her face.  This was about to be MAJOR.  This box was huge, had an assortment of beautiful bunches and all of them still had the original price tags on them.  I pulled Pier One branches and, Islanders, do you have any idea how much those cost?

The associate returned with the news that the stickers on the BOX were correct.  The entire box was only $6.99!!!!  I was just so excited.  Major, I tell you.  MAJOR.

I spent one evening sorting the flowers; I had to carve out time to appreciate and enjoy meeting all of my new flowers.


That night I spent an hour squealing, jumping, and planing for arrangements to come; it is going to be awesome!  Check out some of my loot:


Half the fun of shopping in thrift stores is the constant change of inventory!  You just never know what you'll stumble upon!

Visit your local shops to see what you can find!

Happy arranging!

Photobucket

Thursday, February 5, 2015

DIY Valentine's Tutorial

Check out this awesome tutorial from Picmonkey for valentine labels!  I used this tutorial to make these adorable labels:


I'm planning to use these labels for some cute pencil valentines.  I will cut two slices above the word WRITE and slide a pencil through.  Would you like to make some personalized labels for folks in your life?  Check it out the details below...

Tutorial: Cute Kids’ Valentines

It’s that time of year when kids hand out pink valentines! Pink, wot? Okay, we realize that not all children are fans of pink, so along with our classic pink-on-pink design, we also created one that goes beyond the usual go-to colors for the holiday. Our designs are so easy and fun your kids can make them too! Pull up an image on PicMonkey and play along at home!

Start from Collage

screen shot shows how to set up your layout in Collage
Beginning in Collage, click the Layouts tab. Click Ducks in a Row and choose the second layout. For this design we used the dimensions 600 x 200. You can change the dimensions with the toolbar below your layout. To adjust your border spacing, click on the Backgrounds tab and set the “Spacing” slider to 10.
Tip: If you want to set up a full sheet of valentines, see our tutorial: Make Your Own Gift Tags.

Add swatches

screen shot showing dragging swatch to a cell in Collage
Next, go to the Swatches tab and select the Sweethearts theme from the dropdown menu. Click and drag the swatches into your empty cells. When you are finished, click the Edit button in the top toolbar. This will bring your design into the Editor, where you can add overlays and text.

Add dotted square borders

screen shot showing how to resize and pick a color for the overlay
For the dotted outlines around each valentine, click the Overlays tab. Click the dotted square in Labels. Click and drag the circular handles on the corners of the overlay to resize it and then pick a color.

Quick Tip: how to duplicate an overlay

screen shot showing duplicating an overlay
A really easy way to add the same overlay to your canvas multiple times is to duplicate it. Right-click on your overlay and select “Duplicate overlay” from the menu.

Add the critters

Screen shot showing the two-color options including transparency
Find the animal overlays in Ordinary Beasts. The bunny, the cat, and the monkey are two-color overlays. The beauty of two-color overlays is that they give you so much variety. You can have two different colors, the same color, or make a color transparent. For this design, make Color 2 transparent.

Add the message

screen shot showing how to adjust text with Text tool
Now it is time to add text to the design. Click the Text tab and select the Unkempt font. Click the “Add Text” button at the top of the text menu and type the text into the text box that appears on your canvas. You can change the text size by using the “Size” slider in the Text palette or by moving the circular handles on the corners of the text box. After you have the size set for your text, move the text box into place on the canvas. Now all you have left is to add the text for the other two squares.

For the original tutorial, click here.  Picmonkey is a great way to save money and let your creative juices flow without the worry of fancy software!


I'll share the finished product next week.  The kid and I are working on them this weekend!  

Photobucket

Wednesday, February 4, 2015

WW: My Valentine's Designs


Photobucket

Monday, February 2, 2015

Maya Mondays - An Unbeatable Combination


Photobucket

Life Update - Divorce.

In my last post, I mentioned it's been 6 years since I last blogged and this particular life update is one of the reasons I buried my he...

© Shipwrecked on Fabulous Island. Made with love by The Dutch Lady Designs.