Thursday, February 23, 2012

Nina's World - A First Birthday to Remember!

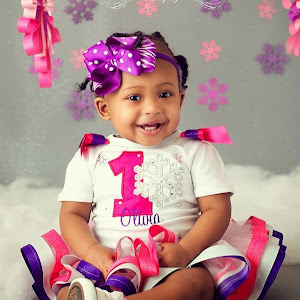
Our Baby Doll Bakery Birthday Party plans are on hold because I was contacted to help with a very special client's 1st birthday party next month! 

Theme: Elmo's World!


DUH, the birthday girl loves Elmo... I, however, was surprised at how many options there are for an Elmo party.  Colors, featured characters, food, activities, etc. It can either be a field day or a nightmare for a planner.  With so many options, it's important to remember this:

Every successful event requires a good plan and every good plan requires focus. 

To help focus my client and to manage her expectations upfront, I created 3 inspiration boards (a girly pink Elmo party, a Sesame Street party, and an Elmo's World theme). The decision was almost immediate: Elmo's World it was!  Here's the inspiration board:

The party will be hosted at a local venue with a soft play zone for tots and a separate party space.  My challenge will be to take the cookie cutter party space and use the inspiration board to create a cheerful, colorful and UNIQUE event.  I've got loads of tricks up these sleeves; the party is going to be fabulous!  Some other event highlights include:

- A scribble table for the babies 
- A photo backdrop to look like Elmo's house
- Place settings: color page placemats with scribble place cards and handmade party hats
- Crayons and coloring book favors
- Elmo Song dancing
- Goldfish activity (TBD)

Who knows, maybe I'll get to start this weekend... Here's a list of tutorials coming soon:

- DIY Sesame Street signs (wooden/paper versions)
- Crayon-covered floral base
- Scribble photo backdrop (props?)
- Scrapbook paper backdrop for food table 

...and many, many more.  ALL in 3 weeks?! OMG. I have SO much to do!

Photobucket

Wednesday, February 22, 2012

Yum-O{reo}

There are times when I love shopping with Munchface.  She notices the most random (and sometimes totally awesome) things.  Some examples of her random awesome-fantastic-where-has-this-been-all-my-life finds include: Mickey cheese shapes, individual cupcake holders (with PLASTIC icing-shaped caps), ice cream scoopers that are shaped like animals and the new Goldfish flavors... She always makes shopping an adventure (even when she picks out clothing for her IMAGINARY younger sibling)... During a recent trip to our neighborhood Walmart, she found perfection in a tube:
I HAD to have some... and 1 box of this:


To create these OREO WHOOPIE PIES:


Here's how I made them:

1. Combine 2 eggs, 1 stick of softened butter and the cake mix

2.  Spoon cookies onto sheet (they spread so be sure to leave enough space)

3. Bake on 350 for 10-12 minutes


4. Let cookies cool for 10 minutes

5.  Flip one cookie over and squeeze the Oreo icing on the bottoms-up side (I let Z put her Mardi Gras colored sprinkles on top of the icing at this point)


6. Sandwich another cookie, of similar size, on top


7. Squeeze the two together so the icing is evenly distributed to the edge of the sandwich (Munchface LOVES this part)
8. Pour your milk, toast your glasses and enjoy your easy Oreo whoopie pie :)

Sidenote:  Hubbs started a diet and came home as soon as we finished icing our cookies.  I whispered to Munch that daddy was on a diet and she stopped chewing to tell me, "that is so sad for him" *CLICK*

Yes, yes it is sad for daddy!

 I'm ALWAYS looking for quick kid-friendly recipes. Do you have any to share? 

Linking up:
Country Momma Cooks


This post was featured in Baker's Delight via twitter... Social Media is amazing, isn't it?! 

Photobucket

Tuesday, February 21, 2012

Craft Vault: Minnie Topiaries

While cleaning out my craft pile of junk space I found 2 topiaries from Munchface's Minnie Mouse bowtique birthday party that I forgot to share:

Poor cell pic, sorry!

Poor cell pic, sorry!


Here's how I made it:

Supplies
- Topiary (purchased from Goodwill $2)
- Wreath Form (purchased from Dollar Tree)
- Styrofoam circles (purchased from Dollar Tree)
- Black party streamers (purchased from Dollar Tree)
- White party streamers (purchased from Dollar Tree)
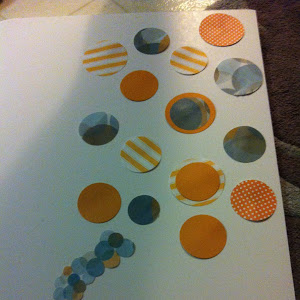
- Circle-punched scrapbook paper (purchased from Michael's)
- Boa (purchased from Michael's)
- Coordinating wrapping paper for bow (purchased from Walmart over Christmas)

Steps
1.  Wrap the wreath form and styrofoam circles in black party streamers.  Be sure to glue periodically so the streamers stay in place.
2. Glue the covered styrofoam circles to the wreath form (as ears).  Note: hold the circles in place until the glue is completely cooled (this takes about 10-15 seconds)
3. For the bow...Take your scrap paper and cut a strip (2 inches thick, 6 inches long).  Fold the paper in half (length-wise) to create a crease.  Dab glue down the crease. Fold the edges inward to the glue to create a "bow" shape.  Squish the middle and wrap with another piece of scrap ribbon around the center.  CONFUSED YET? If so, don't be. I'll post a bow tutorial OR you can opt to glue an old (or purchased) bow... 
4. Remove any greenery from the topiary (including the entire top, it should be a completely bare).
5. Cover the base with the white streamers creating a "ruffle effect."
6. Glue circle cutouts to create a polka dot pattern on top of the white streamers.
7. Cover the base with the "boa" or other material (Paper shred? Tissue paper? Fabric? Candy? ENDLESS possibilities here, folks).
8.  Dab hot glue on the stick and carefully place the Minnie silhouette wreath onto the stick (you might have to move the streamers, if they tear, no worries! Glue them back in place.  Note: AGAIN, hold the topiary in place until the glue cools and VOILA! You have a Minnie topiary.
Poor cell pic, sorry!

You could use the Minnie wreath:
- On the entrance or doors
- Minnie/Mickey wreaths girls'/boys' bathroom signs
- As a reference point to create a Hello Kitty version (using white streamers, and triangles for ears)

Get creative and feel free to share!

I'll be cleaning out the craft vault periodically.  I got a few messages about the topiary after the feature so I wanted to post this one FIRST

Be sure to tune in tomorrow because I korked (curled) my own ribbon and will share the step-by-steps :)

Photobucket

Thursday, February 16, 2012

Space: A New Oral Frontier


I interrupt your regularly scheduled program to bring an overdue (2 weeks late) announcement:

You may recall my post (here) where I told you about our cute little tooth pillow... Well, I don't know if I ever showed you the finished product.  Islanders, meet Ms. Bow-Princess Tooth Pillow:

Did you click the link for the original post? If you did, please note your eyes aren't playing tricks on you; that post was in October.  Neither the fearful Munch nor I nor the wiggly tooth was ready to part ways. So, in her mouth it stayed...  Which was oral drama for the other baby teeth(note the gap that formed):

Then Hubbs and I returned from my birthday trip to Montego Bay, JA and I noticed the kid's little gap shifted. Weirdest thing to see...


 Sidebar: See that hat? OF COURSE as soon as we head out for a romantic getaway, Munch is named STUDENT OF THE WEEK!  Luckily, however, I returned soon enough to read her favorite story (of the day) to her class and to see the poster she made ALL ABOUT HER:


Her favorite food is fish?! That's funny because I try to AVOID cooking it so it doesn't make the house smell, lol.  O and I 'bout cried when I saw she wants to be a MOMMY when she grows up ::tear:: O and her wish for American [Girl] doll stuff? IGNORED. 

 Where were we? O the tooth. 

Me: "Munch, let me see your mouth."

Munch: "AHhhHHh"

Me: *click* "Euuw, close your mouth, girl!"


CLEARLY that thing had no intentions of gracefully bowing out; it was time for a PRO.  I enlisted the assistance of our beloved Ms. Sandra and, with her little string and a smile, she looped that little sucker right out.


Miss big girl was SO happy she smiled allll the way to the "circle-circle store" (Target) to pick up a bathtub for her doll!


 There was a little drama with the tooth night 1. Well, what-had-happened was... I was so excited that I didn't remember the whole TOOTH FAIRY role and actually  left the tooth in my car. She woke up and screamed, "MOMMY my tooth is in the car so the tooth fairy didn't bring me anything!!"  I made SURE Hubbs didn't forget to remember the next night:


 OK, so what she lost a tooth, right? It's not like she's going on her first date or driving or *gulp*... I can't.  I mean, I'm sure she's still my little-big girl who sings her favorite songs rockin' my hot pink lip gloss...


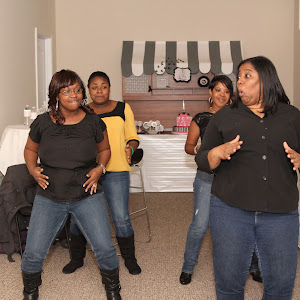
  AND who robot dances in the toy aisle...


 No one told me it would be hard to watch my child grow up...  I guess this little island is for me to document these little moments for reference when my memory fails me.  Thanks for e-listening to our "drama." I tellya, without you guys and the adorable book, Silverlicious, I don't know what I'd do to cope - lol.

What milestones have you come to and CONQUERED? 

Photobucket

Life Update - Divorce.

In my last post, I mentioned it's been 6 years since I last blogged and this particular life update is one of the reasons I buried my he...

© Shipwrecked on Fabulous Island. Made with love by The Dutch Lady Designs.