Friday, January 17, 2014

Easy Mini Meatball Subs

O, Islanders. I've been really emotional about Olivia's first birthday.
To know that she's gone from our little peanut to a wiggly noodle is just crazy to me.  I know what you're thinking and YES, I've been through this with Munch.  NO, she's not my baby BUT...
Isn't that what coffee tables are for?  Crawling tunnels?
I thought time would've slowed down by now... that 'Liv would be a baby for longer.  After all, I know how to sit still and enjoy babies now… I was careful not to rush her to the next milestone, she was always fine in all her baby glory. 

Munch leaning into the playpen to steal kisses before bedtime.  Yes, 'Liv has to sleep in Munch's room when she visits with us.
Despite my best efforts, God gave Time a different plan.  Olivia's turning one whether I like it or not.
Wait.  Islanders, didn't I say not to talk about it in yesterday's post?!
Moving on...
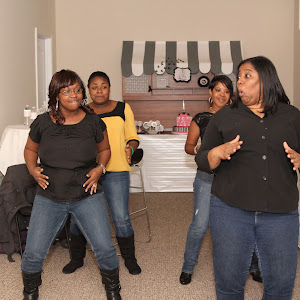
I've been nostalgic and stalking my own photos from the baby shower (read the posts here).  While reading the posts, I realized I've never shared one of my easy party menu items.
Mini Meatball Subs
I love meatballs.  Seriously, I love them so much that I have several recipes (the Hawaiian, the grape jelly, the BBQ, the marinara, the hand-rolled, the cheese-filled, the gravy, etc.)
They're just an easy crowd-pleasing comfort food.  For the Made In Paris shower, I wanted to provide bite-size food that didn't require a fork.  I also wanted food that was equally as cute as it was filling.  This EASY meatball sub recipe is my go-to for events of this sort all the time!
Ingredients
- Meatballs (sold in the freezer section)
- Spaghetti sauce
- Dinner rolls
- Provolone cheese
Step-by-Steps
1. Preheat oven to 400 degrees
2.  Place meatballs in a baking dish.
3. Bake meatballs for 15 minutes.
4.  Remove from oven and pour sauce over meatballs.  Stir to ensure sauce is evenly distributed.
5. Return to the oven for 30 minutes removing periodically to ensure sauce distribution.
6.  Remove meatballs from oven.
7. Slice each dinner roll on it's top.  I like to cut in the shape of the letter -V with the widest part at the top of the loaf.  Remove the excess bread and place a slice of cheese inside the roll (I use half slices for each sandwich).
8.  Place 2-3 meatballs in the "bun."
VOILA! 
Enjoy your easy and delicious mini meatball subs!
Photobucket
Miz Helen’s Country Cottage

Thursday, January 16, 2014

Growing Pains

Recently, we wished our sweet nephew, Little Derrick, a happy birthday. 

 
I know what you're thinking and he had on a sweater but was wiggling too much, worked up a sweat and took it off, lol.
 
 
Yo! Gabba Gabba is his favorite show and the  birthday party theme of choice. 
 
 
I brought our Yo! Gabba Gabba cds and the kids had a wiggling good time.  Chef Joy made the cake and, long story short, it was a sweet little party for my sweet little nephew. 


I can't believe he's two already :(


No, he's not holding up the number one.  He thought he was fooling the grown-ups by raising his hand super high before he touched the cake.


All of this celebrating got me to thinking about an upcoming major event, Olivia's birthday.  My Wordless Wednesday post this week was really all about the bittersweet realization that my tiny birthday twin is REALLY turning one.


Let us agree to not talk about it too much, mmKay?


That smile.  Those cheeks.
 
ONE?!
 
I need a moment to regroup from all these growing pains.

Photobucket

Wednesday, January 15, 2014

WW: Guess Who's Turning 1

Wordless Wednesdays


Photobucket

Tuesday, January 14, 2014

Powder Room - Updated!


Judging from the title, you can probably conclude Mr. Red, my fabulous antique cabinet we talked about here, was hung in the powder room just as I planned (and Hubbs doubted).

 
I mentioned how Hubbs agreed we would host Christmas at our house.  Well, I know him very well and I knew that I could use our holiday plans to complete projects around the house.  I made a list of things I wanted to get done and hanging Mr. Red was at the top!
 
I worried the wall didn't have any studs to mount the cabinet so I researched drywall hooks that would fit the design of the cabinet.  There were a few holes from its previous life in an auto garage:
 
 
I planned to re-use those holes to mount the cabinet.  I headed to one of my favorite places that has everything - Walmart.
 
I searched their anchors and hooks section... NOT because I thought they would have the best but I figured I'd find something that would get the job done.
 
WRONG ANSWER!
 
They had hooks for hanging large pictures but nothing I trusted for a cabinet that would hang above my guests' heads in the restroom... I quickly realized I couldn't half-step.  I would have to make the drive to a hardware store.
 
While in Walmart, I turned the corner from the hook aisle and saw the paint section.  O crap! Here I am planning to mount a cabinet and I haven't even considered this major change would make it difficult to PAINT around it.  In a semi-panic, I browsed the paint colors until I found a gray that resembled the color I wanted in the space. 
 
I know. I broke my own rule and decided to purchase 1 gallon of the paint.  There was no time (in my schedule) to DECIDE on the perfect shade.  I had to go with my gut.
 
Luckily, I chose a great shade of gray.  It was light enough to showcase the size of our powder room and complimented  my décor choices (that had been in a small pile for months) very well.  I spent that evening painting!  The time wasn't spent hanging the cabinet but I felt a sense of accomplishment.
 
Did I just add an item to my mile-long list and cross it off before the ink dried?  Yep, I did.
 

I hung shelves, I hung mirrors, I laid my rug down. Then, I looked at Mr. Red who rested UNcomfortably on the floor.  BLAH!
 
He needed to be hung *like* NOW!
 
I yelled down to the basement announced to Hubbs that I needed his help with the cabinet so he needed to tell me when he would be available... We confirmed Saturday.  In preparation, I went to Home Depot and picked up these amazing drywall hooks (amazing... so I thought).
 
 
I had the hooks. I had the man. I was ready to go!
 
The man was focused.  I was focused.  I measured and marked and planned and - ding dong - the doorbell rang?
 
It was Devona surprising us with her homemade cranberry eggnog bread - YUM!

She giggled at the view:


No, this dude doesn't have a shirt on YET AGAIN.  Yes, his butt is in my face.  Yes, he's balancing on the toilet BOWL (one wrong step and his foot would've gone in).  No, this isn't a proud moment for either of us but Devona?  She thought us working together was the cutest thing ever, lol.

She watched as we struggled. Hubbs followed the instructions on the package but, for some reason, the WingIts weren't able to get a tight fit in the drywall to support the weight of my beloved cabinet.  We tried 3 hooks and NOTHING.


He got frustrated.  We woke early that morning and spent the day crossing things off the to-do list.  Hubbs helped me hang pictures, clean out our bedroom, load donation items into the car... He helped with (some) Christmas décor, finished 99% of our Christmas shopping and now this? 

Hubbs has the patience of a gnat so I knew he wouldn't last long... Here it was eight o'clock at night and he had enough.  PLUS, he knows Devona has a knack for things like this so his quitting was ok.  He talked trash about the hooks, reminded me how he already TOLD me the cabinet would never hang on the wall and got ready to meet his friend for, as he put it, much-needed drinks.
 
Devona, with her freshly painted nails and festive holiday attire, agreed to help me.  I had random holes in my freshly painted walls, I needed something... Or I might cry.  For real.
 
We headed to Panera then to The Village then to Lowe's in search of the RIGHT anchors.  Devona suggested we look for another mount and pick-up lower brackets to serve as additional support.
 
We found them:
 
 
SnapTogglers!!!
 
They were SO easy to install and made me feel comfortable that they can support the weight of the cabinet. Here's how they work:

 
 It took more time to get me used to the drill than it did to actually HANG the cabinet.  O and to get the screw into the STUD we found, lol.  Only in my life do I plan to mount a cabinet without a stud (which would easily support the weight) only to discover there IS a stud.
 
The SnapToggler is Devona, a for real DIY-er, approved.  Need to mount something and don't want the mess or hassle of the stud, try the SnapToggler. They're, simply put, AMAZING!


We added brackets to the bottom as additional support.  I want to eliminate the chances of this heavy cabinet EVER falling on our guests.

Look at Mr. Red hanging there... in all his glory... looking handsome and junk!

 
Can you see the START of my Valentine's décor? I don't have much but I think that little shelf will hold seasonal décor
 
Cheers to having a vision and finding the means (and the right friend) to make it happen!
 
Photobucket

Life Update - Divorce.

In my last post, I mentioned it's been 6 years since I last blogged and this particular life update is one of the reasons I buried my he...

© Shipwrecked on Fabulous Island. Made with love by The Dutch Lady Designs.