Saturday, September 15, 2012

Doll Bakery Party - The Sweets.

With our table set up and our party favors ready to go, we can talk about the yummy sweets!


Backdrop.

I was pleased with the Michael's party room but I couldn't stand having the walls covered with posters and other NON-bakery party items.  To address this issue, I purchased 2 rolls of silver wrapping paper and framed the dessert display.  It helped give a polished look without the weight and worry of hanging fabric:


Banners

Michael's sells pre-cut packets of triangles with 4 triangle sheets of each color. I used the pink and white pennants along with stickers and baker's twine to make a quick and EASY banner:


I used the pennant triangles to cut card stock I had on hand for the "Zion is 6" banner along the bottom of the table:


Cake

That CAKE makes me smile whenever I look at it!  My favorite part? The Munch-inspired custom topper:


What's not to love?  The topper has her OWN mini version of the birthday cake! I LOVE it!  Misty did an amazing job :)


It was definitely a conversation piece!  Hubbs was so impressed he said it was too pretty to eat and did not let us cut the cake at the party, lol.


Other sweets included:

Cake Pops
I ordered the infamous red velvet cake pops from my favorite cake pop bakery - YUM!


Mini Cupcakes

The mini red velvet and strawberry milkshake cupcakes were equal parts delish and cute!


{Not-so-mini} Mini Cheesecakes and Lemon Meringue

Chef Joy made some yummy sweets for everyone to enjoy!  Although we have a different definition of MINI, they were so good you appreciated the larger serving.


The mini chocolate chip and mini iced cookies were so delish they were the first to go!

Other Refreshments


I love that I was able to order multiple packs of the straws from Pick Your Plum.  I also used my plastic cupcake wrapper vase to hold them (keeping with the theme).  The straws were the perfect additions to the Mason jar drinks!


Before we left the house, I placed the jars in their container I planned to transport them in.  I cut flower lemons (easy tutorial coming soon) and dropped 1 slice in every jar.  I poured half store-bought lemonade and pink lemonade in each jar taking care to leave plenty of room for ice when the party started.  I closed the lid and voila! Individual servings of juice without the hassle of carrying gallons of juice or the worry of spills - LOVE!


I kept the menu simple.  We picked up a few $5 pizzas, catered wings and wraps and had a few bags of chips for guests to enjoy.

Shall we review?

The Michael's staff handled activities, bakers and caterers handled the food and I was able to HOST and enjoy the event!  SuCCeSS!

O and the sweets were a HIT too! Hubbs was caught sneaking goodies before he was supposed to, lol.


Now that we've discussed some of the details, I can't wait to share the activities.  Just imagine, I had the girls sleepover the night before so I had to comb all of their hair and make sure they were ready to go BEFORE I could leave for set-up.  

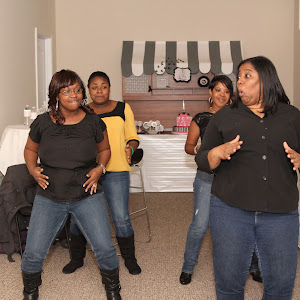
Aren't they all gorgeous?!


See you tomorrow with the party's activities!
Photobucket

Thursday, September 13, 2012

Doll Bakery Party - The Favors

Yesterday, we talked about the party table.  Today, let's talk about the favors.


Doll Favors

I made no-sew aprons for the dolls.  First, I purchased 3 sheets of pink felt and cut them in quarters; they were the perfect size for the dolls! I glued ribbon around the top, a small felt square for a pocket, and embellishments.  In about 20 minutes, I had 6 aprons:


I found mini boxes for less than $1/each at Michael's and the tiny favor boxes were perfect additions to the doll table settings.


I made tiny tags, used mini paper clips and baker's twine to tie it up fabulously!


Craft Aprons

I ordered personalized aprons from Oriental Trading and, despite my reservations, they did not disappoint!


Get this - they're craft aprons and those "pleats" at the bottom actually hold individual crayons! 

I purchased bakery boxes and folded the aprons so the names were facing out.  Aren't they cute? 


The tags were double layered - on the bottom, the chevron digital paper and, on top, just some Microsoft Word tags I made.  Yes, I'm feeling sham-wow amazing and I will show you how to do it too (just not today)!

In addition to the aprons, the girls left with cookies they decorated, bead jewelry they made and chef hats:


I just LOVE how everything turned out and how the girls will have favors they can enjoy for years to come!

Let's talk the party's sweets tomorrow shall we?

Great.

See you then!

Photobucket

Tuesday, September 11, 2012

Doll Bakery Party - The Craft Table

Long overdue.  Much anticipated.  All that and then some.  The blog post you've been waiting for is finally here!

OR not?!  

Come on.  Humor me, islanders.

I planned to keep Munchface's 6th birthday party simple and to host the event at our small home.  As the date neared, however, it became crystal clear that my house would be bursting at its seams with people and stuff on the date of the party.  I couldn't POSSIBLY focus on the party because I was too occupied preparing for guests (ya know looking for my good towels, hating that I need to finish touching up paint, dreading not having granite...the usual stuff I do).  

Queue my favorite place *like* in the world, Michael's Arts & Crafts.  

I went to the store.  I spoke to the sales associate.  I booked my party.  AND I did NOT think anything else of it.  Yep.  I, the party planner, paid $50 for an event space in a retail store.  What do you mean how'd it feel? It felt amazing.  My little $50 got me a room for 3 hours, tables and chairs, the staff to teach icing techniques and crafts PLUS immediate access to any last minute items I needed.  

Shoot, it was exciting to know the party plans were underway and I only had to focus on the decor and food. 
One of my primary areas of focus?  

The table.

Michael's provides one long craft table.  This table serves as the place where instructors demonstrate techniques, where the girls will eat and where the crafts will be made; it needed to serve multiple purposes.  Because we were expecting a small crowd, I divided the table into 2 areas - the girls went to one end of the table to learn a technique then returned to their assigned seats to put their new skill to use.  The nature of activities made my decision to purchase baby shower wrapping paper as a table cover a no-brainer (they can't mess up my good linens, lol). 

Anyhoo, let's talk table deets, shall we?


HATS.

Remember our doll party hats?

They looked absolutely adorable on the table and made for the perfect additions to the doll settings:


Party City has appetizer-sized serveware and the forks, plates and cups are the PERFECT size for dolls!


Our big girl guests received hats upon arrival too.  I kept the chef hats flat so the girls could decorate them upon arrival.  A gray marker helped "personalize" the hats and made assigning seats a breeze.  I fancified the hats with fabric embellishments from Michaels glued on top of coordinating cupcake wrappers:


Aside from hats and the doll placesetting, I had the favor boxes for both the girls and their dolls:


We'll talk favor box contents tomorrow but aren't the doll favor boxes adorable?


I just swoon over baker's twine!

My goal was to transform the Michael's craft room into a room fit for a party.  This table was the focal point for crafts, instruction, food and so much more...  It needed to be functional and CUTE!

Next up tomorrow? Favors

Until then,


Photobucket

Wednesday, September 5, 2012

Wordless Wednesdays: The First Day.


Free Printables found here.

Photobucket

Life Update - Divorce.

In my last post, I mentioned it's been 6 years since I last blogged and this particular life update is one of the reasons I buried my he...

© Shipwrecked on Fabulous Island. Made with love by The Dutch Lady Designs.