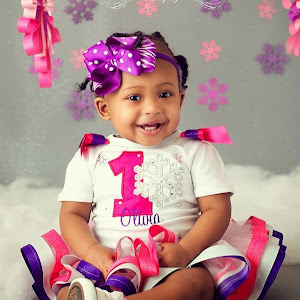
I have embraced my inner Real Housewife of NJ and started to create fabulous little bows for munchface. I mean, something about oversized, chunky, grosgrain bows just make my soul happy... This is the first of MANY tutorials geared toward other mamas just like me who have a thing for bows, headbands and any other hair decorations for little (and not so little) ladies :)
Finished product will look like this:
Step 1: Take a paper cup, flip it upside down and trace 5 circles. Flip over and trace 4 circles with the smaller base of the cup.
You will have a total of 9 circles (5 larger; 4 smaller) as pictued below:
Step 2: With a piece of felt, trace the base of a cup. This will serve as the base of your bow.
Step 3: Take one of your large circles and dab the center with hot glue. Fold in half and hold for about 10 seconds. It should look like this:
Step 4: Place hot glue on one side of the semi circle (pictured below):
Again, hold in place for a few to allow the glue to set (demonstrated below):
Top view:
Step 5: Dab the back side (as pictured below:
Step 6: Place the "point" on the felt bow base like so:
Repeat with 3 more circles. The 4 should cover the felt bow base. Take the 5th and repeat Steps 1-4. Place glue on the point, then place in the center. This piece will give the dome shape so do not glue anywhere other than the point. It will look like this:
Step 7: I like to glue the pieces together so the felt is no longer visible and it makes it a little more sturdy. It will look like this:
Step 8: glue the headband to the felt base:
Step 9: cut a small square of felt to reinforce the bottom of the bow:
Step 10: Glue the 4 smaller fabric circles to their base and, instead of the center piece of fabric, embellish with a gem (or random lost/broken earring). It will look similar to this:
LOVE! It adds that extra something to every outfit AND you can adhere these to ANYTHING! I've made a bib necklace, sewn them to purses, made a double sided version as a keychain... the possibilities are endless! HAVE AT IT!


Oh, that is so cute! I would totally wear that!!! Love the pink. :) Visiting from Home Stories A to Z. Hope you'll stop by my blog to say hi. :)
ReplyDeleteSo cute! Thanks for sharing the tutorial at Beach Cottage Good Life Wednesdays.
ReplyDelete