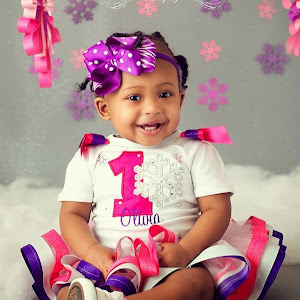
The last we spoke, my family was celebrating one year of MaseFace fun. While I'm still dealing with the realization my sweet nephew is an entire year old, I wanted to share an easy party craft I came up with for his party.
Where the Wild Things Are Water Bottle Craft
In the case of MaseFace's birthday party, my sis-in-law was actively planning the event and I offered to support as little or as much as she needed. A few days prior to the event, she asked me to handle a few minor tasks which included picking up water bottles.
PICK UP WATER BOTTLES?!
Let me put this into perspective, Islander. I didn't design the invitation. I didn't help with the cake. I didn't make favors. I. Did. Nothing. I mean, I received one photo of a canvas she was using as the inspiration for the party color scheme and decor earlier in the planning process but that was it.
I knew this task to pick up water bottles was my only opportunity to do something for my nephew's first birthday so I seized it and I came up with something easy to fit the theme.
What You Need:
- Black Marker
- Yellow Marker or Puffy Paint
- White Card Stock (8 pieces yielded 48 labels)
- Yellow Card Stock (2 sheets)
- Scissors
- Hot glue
- Water Bottles (I made 48 mini water bottles)
What You Do:
1. Remove one water bottle label and use it as a guide for the width of the labels you will need. Cut the white card stock to width. I was able to get 6 labels per sheet.
2. Use the black marker to draw a crown. I chose this method because I wanted to mimic the look of the artwork - rustic, homemade, and simple.
3. Use the yellow marker or puffy paint to color the crown. Replace the label with your new label using glue to hold it in place.
4. Cut a zig-zag line along the edge of the yellow card stock. It should be about 1-inch wide. Once you cut the full length of the paper, use the remaining zig-zag edge of paper to create the next strip (cut a straight line).
5. Cut each zig-zag strip into pieces 2-inch pieces.
6. Roll the pieces to make mini crowns. Use glue to secure the ends of the crown together.
7. Dab the bottom of the crown with glue and place directly onto the water bottle lid. VOILA enjoy your pretty water bottles!
Tips and Notes for this project:
OMG, the water bottles were a hit! The best part? In less than one hour, I was able to make 48 water bottles from start to finish! I did each step in bulk so 48 label cuts then 48 crowns drawn and colored, and so on. I knew they were a hit when this conversation happened:
Jay (sister of sis-in-law): "You know, you can't ask everyone to pick-up water for your baby's party. You have to ask Tabby... because well, THIS happens!" *waves hands in directions of water bottles*
Sis-In-Law: *covers face laughing* "I know! I know! She just gets it and knew exactly what I'd want!"
You can apply the concept of mini crowns for a prince- or princess- themed party... what about a Queen of Hearts or Alice in Wonderland party? The mini crowns can be placed on any lid really... Seriously, these labels and crown toppers are super easy and have a major impact!
The best part for the party plannin' mom-to-be? The smallest item, strategically placed, made a huge impact for guests! All of the party guests thought the water bottles must've taken a LOT of time... Seriously, they were super easy, required less than 10 pieces of paper and most supplies, I already had on hand. The best part for the crazy crafty aunt? I got to help make my sweet nephew's party special!
Cheers to gettin' in where you fit in and using small things to make a big impact!


Post a Comment