Bows

Friday, July 15, 2016

DIY Gift Box Candy Bar Wrapper

Melina loves chocolate.  Her mom asked to incorporate a few of her favorite candy bars into the sweets table.  When she made the request, Mrs. Lucy and I had already planned for a candy assortment, sugar cookies, a variety of cupcakes, the cake, chocolate-dipped treats and more.
The expense to purchase candy bars, to purchase a candy wrap design to fit the theme, to print on a quality paper and to assemble, simply put, wasn’t worth it.  Think about it, the candy bars weren’t serving a major purpose (like favors or a table highlight) so, I planned to purchase one dozen bars and make it work.  I came up with a DIY design using a few materials found almost anywhere paper is sold.  It was super easy and will work with any theme!

 Here’s what you need:

-       -   Standard-sized candy bar of your choice
-       -   Cardstock or scrapbook paper in your choice of print/color
-       -   Glue
-       -   Thin ribbon (I purchased the thin ribbon spool from Michaels for less than $.50)

Here’s what you do:

1.  Trim the paper lengthwise to be the width you need for the candy bar.

2.  Cut the paper in half. Using 8.5 x 11 cardstock, I trimmed about 2 inches off from the width and cut the paper in half to wrap an entire Hershey’s bar.

3.  Cut 10” of ribbon and lay it on top of a candy bar. 

4.  Wrap with the paper, gluing the back for added security.

5.  Tie the ribbon into a bow and dab glue behind the bow to hold it in place.


Easy, elegant and versatile for any event!  You could replace the bow with a label, a theme-appropriate sticker, or a hand-written message.  


The best part?  This treat can fit any theme and served as a subtle nod to the baby shower theme!

Photobucket

Thursday, July 14, 2016

Easy Chocolate-Covered Oreos

I have a number of events in the coming months. 

Melina’s Baby Shower
Munch’s Birthday Party
Amalia’s Baby Shower
MaseFace’s Birthday
… and more!


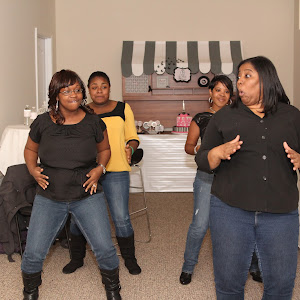
This past Saturday, was the first of many fRamily celebrations; we celebrated Melina’s and Trevel’s little girl on the way!


Before we get started, this was a collaborative effort and, as someone who is cured of my Event Planner Resentment, I welcomed the opportunity to take direction and to provide support.  This is NOT a Tabby-hosted event.  I provided guidance and shower elements but Mrs. Lucy, Melina’s super detail-oriented, bling-loving, and creative mommy, came up with the theme and plan.  I was simply there to do my part and to ensure everyone - guests of honor, shower hosts and attendees - was happy and stress-free.


You see the faces - done, done and DONE!

Now, Islander, you know how I am.  I love to share affordable and innovative ideas for your home and events and this shower is no exception!  It was a great day and I’m excited to share how it all came together. Get ready for cuteness overload!

Friday, May 30, 2014

No Business Like Bow Business

I started this blog years ago with the intent of sharing tutorials for my crafts.  At the time, I was obsessed with making hair bows for a few reasons:

Hubbs bombed a photo of the baby headbands I mailed to a friend.

Tuesday, November 26, 2013

Turkey Hair Bow Tutorial

Good morning, Islanders!
 
 
It's finally time to share the infamous Turkey Bow tutorial.  I've received requests for this tutorial since 2010 when I made Munch's first bow (see the post with its debut here) so I know you're excited!!
 
Supplies
 
- Brown Ribbon (20 inches)
- Pink Ribbon (less than 1 inch)
- Ribbon for Feathers (your choice)
- String
- Hot Glue Gun
- Lighter
- Clippie or Headband
 
Step-by-Steps
 
Note: thinner ribbon works better for this design.
 
1. Cut the brown ribbon into the following pieces - 3 in., 2 in., 1.5 in., and two (2) 1 in. pieces
 
2.  Glue the ends of the 3 in., 2 in., 1.5 in. pieces together to create a loops like this:


3.  For the 1 in. pieces, create a flat loop (pictured below to the far right):
 
 
4.  Stack the loops according to size (dabbing glue at each layer's meeting point):

Back view

Front view
 
5. Repeat with the two remaining loops to create the turkey head.  Glue the head on top of the body:

 
6.  Cut 5 pieces of the feather ribbon(s) to be 2 in. long.  Create the open loops:

 
7.  Glue the loops to the back of the turkey:

 
8.  Cut a small triangle for the beak and a squiggly strip for the "turkey jiggle" (as Munch calls it):

 
9.  Glue to clippie (after covering with brown ribbon OR to piece of felt for headband.
 
10.  Enjoy your festive and fabulous turkey bow!!!


Once I made one, I stopped measuring and whipped up bows for all of our friends.  They make great gifts for little girls:


PLUS, a few spools of ribbon really go a LONG way!


Enjoy!
 
Photobucket

Friday, July 13, 2012

Frugal Friday - A FaBOWlous Frame

Happy Frugal Friday, Islanders!

I mentioned yesterday how I transformed a thrifty find into a faBOWlous addition to God baby's shower decor.  Well, as promised, here's how I did it:

Supplies
- Frame
- Spray Paint
- Hot glue (and gun)
- Paper (or fabric) of your choice
- Ribbon (2 sizes)

Here's my victim for this project:


I loved the shape and size of the frame so I bought it!

I found handmade paper at World Market and thought it was the perfect color combo for this project.

Step-By-Steps
(*singing* DAY BY DAY... What? It's TGIF! Don't act like you don't remember that show! Wait. You don't? ::shrugs::)

1.  Remove the back of the frame. My victim was only 2 pieces (the frame and this cardboard insert), however, in the past, I've used the cardboard insert (and placed the glass behind it) and I've even glued directly to the glass.  Anyways, with the insert gone, I spray painted 2 coats of white on the frame and set it aside to dry.

2. Trace the shape onto the underside of your paper (or fabric).


3. Cut out the shape and use your hot glue to adhere your paper directly to the cardboard.

4.  With your larger ribbon (I found this ruffled ribbon at Michael's), determine the ribbon's placement and the required length.  Cut and glue your ends to the back of your paper-covered piece; no need to be pretty, it's the BACK:

Note: Do not glue the ribbon down on the front (other than an occasional dot) because the clippies slide behind it!

5. Repeat step 4 until you have the desired number of rows:
6.  Layer the next size ribbon on top and use the same technique (glue to the back and add a few dots on the front).

I added a thin turquoise ribbon but this step is not required; I just thought it added a little shumthin'-shumthin' :) 


Secure your paper-covered portion into the frame and voila! You're ALL done!


Here it is with a tiny bow hanging on it:

You get the idea. 

Other things to note: Consider your bows' sizes before you get started.  To maximize your frame's storage, be sure to space rows so big bows can fit comfortably. 

It is Frugal Friday so here's a cost breakdown:

Ribbon: $7
Paper: $3
Frame: $4
Spray paint: $0 (I had it on hand)
Total: $14

I'm having a bow-making station at the shower so this, propped on a small easel, will make a great holder and will double as nursery decor.  OMG!  I could totally see $5 white Walmart frames with room-coordinating papers to organize Munch's bows by colors AND create a collage.  I have a HUGE thrifty frame and I'm debating whether to use it as 1 giant bow frame... Hmmm.  I'm not sure right now but you'll be the first to know.

MORAL: $14 at my local party store would buy me some paper hangings that I'd trash immediately following the event.  In THIS case, however, $14 created a custom bow holder that will look awesome in God baby's room for years to come!

What do you think?


Cheers to a frugal and faBOWlous Friday!

Photobucket

Life Update - Divorce.

In my last post, I mentioned it's been 6 years since I last blogged and this particular life update is one of the reasons I buried my he...

© Shipwrecked on Fabulous Island. Made with love by The Dutch Lady Designs.