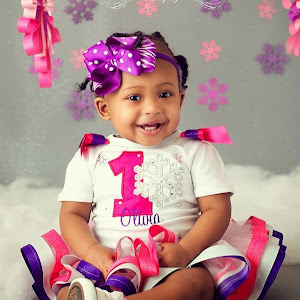
This message is sent from the moon... You know I'm still giddy about the Sunshine Award, right? Wait. What?! You didn't know I got another award? OMG. You must read about it... Like. Now.
I'll wait ;)
I got started and quickly realized my BIG PLANS just weren't going to happen. So, I had to come up with a Plan B because... Well, someone might be expecting it (and because I had 4 pieces of ribbon...)! This whole blogging thing is the accountability I need to meet self-inflicted deadlines.
Craft fail or fab? You be the judge...
Here are the Steps
1. Cut 4 7" strips of ribbon
2. Heat seal the ends of the ribbon with a lighter (to prevent fraying)
3. Use a small dot of glue create a "loop" (pictured below)
4. Use a small dot of glue to create double loops. NOTE: make sure the patterns line up and that they are comparable in size (pictured below)
5. Stack the glued double loops like so:
6. Pull out your handy-dandy craft floss (I got a grocery store bag of *like* 50 from the thrift store for $2 but they are sold at Walmart and craft stores). You'll need roughly 6"
7. Wrap the bow in the center and tie a double knot to ensure it is secure.
VOILA! You have 1 BIG BOW! You can choose to use the other side OR this side if you want to stack a smaller one on top... It's up to you. For some reason, my bow looked better on this side.
8. I used some scrap ribbon BUT you can certainly use the same ribbon to cover the center. Steps pictured below (1 plain loop followed by a "knot" version):
9. At this point, you can EITHER adhere it to a headband by a) gluing the bow to a piece of felt b) gluing the bottom of the felt to the headband c) re-enforcing by gluing another piece of felt from underneath the bow
OR
You can cover a clippie with small ribbon and glue your bow right on.
My little model was asleep when I made it so, with my deadline in mind, I had to be my own model. Check it out (don't mind the giant star fish from our trip to the Bahamas... Consider it a co-star from my beachy powder room, lol):
So, what do you think? Craft fail or faBOWlous?
Linking up:
Linking up:


FABOWLOUS! I love it! Riley's going to be sporting one soon!
ReplyDeleteYou have got me thinking this is something I can pull off myself... I think its FaBOWlous!
ReplyDeleteJenny - Thanks! How cute would a bow like this be on that little adorable head of hers? Like a cherry on top of yummy cuteness :)
ReplyDeleteKellieCK - Thanks and you can TOTALLY do this! Let me know if you try it!
FaBOWlous
ReplyDeleteVery cute! Perfect that there is some green in it for this month!
ReplyDeleteThanks for linking it up @ Creatively Living!
--Katie
ShoeHOTLINE: Thanks, boo! I was so excited those 4 strips didn't go to waste!
ReplyDeleteKatie: Thanks for stopping from such a fabulous LINKY party :)