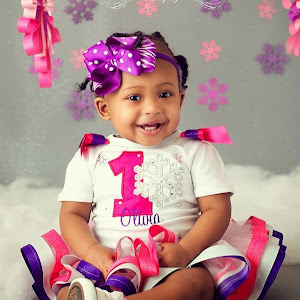
Happy Mama-Made Monday, Islanders! I was thinking about Baby Doll Bakery birthday party plans the other day and considered making a piñata like the Minnie Mouse one I made for Munchface's Bow-tique party last year. It was so easy that I couldn't resist posting a tutorial for all of you. So, order's up!
Minnie Mouse Piñata Tutorial
1. Gather supplies
- Large piece of cardboard (I used an old box)
- Shoe box without the lid(holds candy)
- Party streamers (enough to cover cardboard shape)
- Scissors
- Hot glue/gun
2. Draw your shape on the cardboard. For the Minnie Mouse silhouette, I traced 2 kitchen bowls; the larger one for the head and the smaller one for the ears
3. Cut out the shape
4. Cut a flap on the shoe box (i.e. cut 2 slits then fold the flap up to form a "square" flap). Note: this "flap" will be your means for adding your candy and will be used to fill your piñata so DON'T make it too small
5. Start at one end of your cardboard shape and dab a glue line along the outside edge. Take your streamer and ripple it along the glue line to create a pleat texture like so:
6. Repeat (working your way inward) until you reach the center. Note, you might need to dab glue wherever necessary so pleats are secure. When you reach the center, any exposed area. Lay your shape face-down
7. Glue around the edge of the shoe box. Place the shoe box glue side down) on top of your shape. BE SURE your "flap" is facing the top of your piñata so it will not hang upside down. Let the glue cool for 5 minutes
8. Cover the back of the shape with streamers
9. Punch a hole in your "flap" to string ribbon through for hanging
10. Glue a basic bow to the Minnie silhouette
I was so worried the box wouldn't be strong enough that I got a little 'glue' happy and made the world's STRONGEST piñata... The girls had to stomp the candy out of it:
Learn from my mistake and remember to make your piñata with its purpose in mind!
Are you hosting a spa party? How easy would a nail polish bottle be? Hello Kitty? Follow these instructions with triangle ears and white streamers. Cars? Trace a car silhouette. Microphone, cupcake, animal face, shoe, batman silhouette... ALL shapes that are easy enough to trace! Be creative and be sure to share your projects! Without the shoe box this makes an innovative door decor item to greet guests!
I used cardboard and a shoe box I already had and ONLY I spent $4 on supplies (streamers and ribbon). How easy and awesomely affordable!
Happy gluing!
I used cardboard and a shoe box I already had and ONLY I spent $4 on supplies (streamers and ribbon). How easy and awesomely affordable!
For more of Munchface's Bow-tique birthday party details, click here.
Happy gluing!


We'd love for you to link up this fabulous craft on our weekly Disney Craft link up: http://www.disneyinsidertips.com/2013/04/disney-craft-making-monday-pressed-penny-bracelet/
ReplyDelete