Hi, Islanders! I shared this tutorial over at The NY Melrose Family blog a while back and wanted to be SURE you guys didn't miss it!
Remember the Photo Booth at God Baby's shower?
Remember the Photo Booth at God Baby's shower?
Supplies
- Tissue Paper
-Ruler
- Wrapping Paper
- Scissors
- Marker
- Hot Glue/Gun
Step-by-Steps
1. Measure your wall and cut your wrapping paper to its required length/width.
2. Place the paper flat on the ground. I used whatever I had on hand to keep it from curling (painters' tape and a gum ball machine, don't judge!):
3. Open the pack of tissue paper. Do not unfold it completely(it's easier to cut in step 5).
4. From the bottom, use the ruler to divide the tissue paper into 3" strips:
5. Cut your strips.
6. You're ready to GLUE! Place a short line of glue onto the top (or bottom) of your wrapping paper.
7. Start with the end of a tissue paper strip. Center the strip on the glue. Use your finger to apply pressure and gently slide the paper towards the tissue paper starting point. This will create a "smooshed/creased/crinkled/ruffled" look:
8. Continue gluing from left to right of the wrapping
paper until it is covered with fabulous ruffles:
Repeat, repeat, repeat. Seriously, this project will take some time, however, feel free to shrink it for close-up shots only (poster board size maybe?).
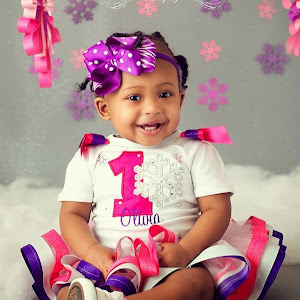
When the paper is covered, snap your fingers, do a happy dance, pat yourself on the -- you get the point, YOU'RE ALL DONE! When I finished, Munch instinctively struck a pose (or 10) for the camera:
Special thanks to Jenny for the opportunity to share and to all of you for taking the time to read! We're saving the backdrop for photos with god baby when she comes home... I think it'll be lots of fun!
Cheers to celebrating!
Cheers to celebrating!


You are so crafty! By the way, adorable model!
ReplyDelete