Friday, March 30, 2012

Celebration Vault: Sweet Pea Shower

All of yesterday's baby talk has me super excited... I was clicking through the island's {unpublished} events and thought I'd share some of my baby showers over the past few months... A mini-series, if you will.

Up first...

Tia's Sweet Pea {mini} SHOWER

BACKGROUND: My church LOVES to celebrate life's milestones so, when Tia announced her pregnancy and asked us to host a small shower, I got to work.  We scheduled the shower to fall immediately after service.  With 2 weeks to plan, multiple events on the same day and the church's annual Fall Festival the day before(for which I was in charge of decor and activities)... Time was of the essence and really posed some challenges:

- 30 minutes for set-up
- The shower was hosted in a large hallway
(to accommodate other events, meetings and rehearsals)
- 1 hour TOTAL for the shower (for games? gifts? and cake? OMG!)

My goal was to quickly create a cute purple and green Sweet Pea theme... I needed to make this hallway feel less HALLWAY and more FABULOUS.  I decided to set the chairs semi-circle and to hang SEVERAL poms above (because they could be made beforehand and fluffed on-site).  The rest of my efforts were focused on 2 tables - the food (which was yum-mazing; Church folk know how to cook!) and the "pretty" table.

SIDE BAR#1: As is the norm for me recently, I found myself stressing about arrangements and personalization and time and details and... Will it be good enough? Will it be pretty enough? Will it- then I just had ENOUGH.  I remembered no one was pressuring me but ME.  Sometimes as the hostess, I need to take a step back and remember what's important...

This post is to share some quick and easy ways to use scrapbooking paper to tie your decor together... I hope you enjoy the simplicity!

O wait.

SIDEBAR #2: Do not let the following pictures fool you... I am not falling victim to my #1 pet peeve with this event planner fad, lol.  LISTEN CAREFULLY: those feature parties you see on websites that have 1 little table of decorations where all they talk about are the details of that 1 little table are deceiving! Don't get me wrong, I'm ALL for a focal point BUT far too often, people get wrapped up in making that 1 little table pretty and forget the rest of the space AND the purpose of the event.  I've mentioned my Recipe for successful events and my #1 priority is to ensure guests have a FUN experience...

Pretty is great but I'll take dollar store tablecloths, a sheet cake and a GOOD TIME over pretty ANY DAY!!

OK, I digress... Back to the {mini} shower:


 I purchased $5 worth of coordinating scrap booking paper (sold by the sheet at Michael's) to create:

Water Bottle Labels
Scrap booking paper cut in strips (held in place with a dab of glue) = quick and EASY labels!
Can you see the plant stand on the right? It's actually a clear serving bowl turned over to give the milk glass arrangement some height.

Dot Garland
I used my various hole punches, scrap booking paper, yarn and hot glue to create the dot garland (pictured further down). It hung over the table and helped to bring in the mix of prints.  I varied circle sizes and the space between... Less work and I loved the look.

Prize Bags
I gave Sweet Pea scented candles and lotion in the green paper bags(from Michael's).  I folded the bags over and glued extra garland dots to serve as "seals."  They were really cute. Check everything out:


Other than the paper, I used the fabric backdrop and the tablecloth to tie everything together...

CONCLUSION: While the shower was adorable, the MOST important part is that we had a blast!  To think, all it took was a $5 paper expense to tie it all together! 

Do you have any affordable tips for events?  Feel free to share them in the comments!

Happy frugal-and-still-fabulous Friday!

Photobucket

Thursday, March 29, 2012

Big News; Tiny Blessing

I've been holding some very exciting news.

... and NO, Oprah didn't invite me over... My blogging heroes haven't asked me for a feature... I don't have granite and we didn't win the lotto... STOP GUESSING so I can tell you! 

I'm bubblin' over because...

I'm going to be a God Mommy!

Do you recognize this adorable face?


Of course you do.  It's Chazity, our sister-cousin (as the girls call themselves) and an immediate extension of our little family.  Well, she's going to be a...

This is the picture sent to announce the news to family & friends. Don't mind the facials, she was very excited about the baby... Just MORE excited that it was Christmas morning at this particular moment.

Let me tell you, she gets her cuteness from her pretty mommy (and MY sister-cousin), Deborah.


Now, back to my news...  This belly:


 ...serves as the cozy place where my God baby grows.  You may be wondering, why today?!
Source

Reason 1:  Yesterday, we found out what we're (you see it... WE'RE) having and I just got off the spaceship that took me to the moon & back thought I'd share my exciting news with all of you...


Reason 2:  4 years ago, Deborah's mom passed away and today, March 29, is her mom's birthday. 

Days like today are hard, 'nuffsaid. 

But God, the author of time and manager of the master calendar, took one of the hardest days of the year for Deborah and gave her a reason to celebrate. 

People say when infants smile, it's because angels are whispering to them... I know God baby's grandma has all kinds of funny stories to tell her grandbaby and I can't wait for many of those random doses of adorableness! Literally, my camera is ready, lol.

Just another reminder to celebrate the little (and not-so little) blessings we have.

.
.
.

Now, Islanders, you know me well enough to EXPECT that I've been planning the shower for both sexes since I found out we were pregnant, right? 

O, don't give me that look, I had to focus my excitement all this time!

Here's what was in daddy-to-be's Christmas stocking; best present ever!

You can expect that I'll be sharing the shower deets with all of you (when the nosey mommy-to-be isn't reading).  I just really wanted to take a moment and congratulate one of my very-best friends in the whole-wide world on OUR tiny blessing.  God knew what He was doing when He sent you into my crazy life.  Thanks for always being there for me and for allowing me to share this special time with you!  I, an obsessive-nerdy-eccentric-dramatic {God}mommy-to-be, take my responsibilities very seriously and will not be all crazy and controlling or squeal too many times with excitement but support you however you need.  I will do whatever it takes to be the best God mommy ever!  Think about it... If it takes a village to raise a child and I've got an entire ISLAND of folks to share the ups and downs with, I think it's safe to say, we're good!


DISCLAIMER:
This is my first god baby so, as you can imagine, it's pretty much *like* I'm giving birth, lol. We're due in August...  I want the shower to be extra special, I want the nursery to be extra fabulous, I will be making little onesies and tutus and headbands and taking loads of pics and kidnapping every other day- You get the point. I am, simply put, excited to celebrate our tiny blessing...

Stay tuned for buckets more of my ramblings on this topic... Between my weddings, the parties, the birthday, my OUR baby, the shower and life in general, I'll be CRAFT CENTRAL!


It hit me AGAIN! I've got a shower to plan, a nursery to decorate and a baby to kiss in the VERY NEAR FUTURE!

What tiny blessing are you celebrating today?


Photobucket

Wednesday, March 28, 2012

Craft Vault: Polymer Clay Cupcakes

It feels like FOREVER since we talked about Munchface's baby doll bakery birthday party, right? 

By way of update, I've decided to pull polymer clay cupcakes out of the Island craft vault and tweak what I've done in the past to make necklaces for the girls (at the party, they'll make bakery-themed bead necklaces for their dolls). 

I've pulled the pictures to share the tutorial with you.  The numbers in the bottom left of the picture correspond with the steps, FYI (no big deal, I'm just a little fancy).

Supplies
- Polymer clay (2 colors)
- Optional: Beads (for sprinkles)
- Clay carving tool (butter knife works)
- Large safety pin


1. Polymer clay is stiff but softens as you roll it in your hands.  You'll need to work the clay for about a minute to get it soft enough to manipulate... Then roll 2 balls (1 in each color) about this big (picture #1).

2. Take one ball (the one for the icing) and make a worm(see picture #2)...My assistant, Munchface, demonstrates worm rolling...You see that blurry hand; she is WORKING it!

3. Nope...too fat, Munch.  It needs to look like mommy's...


4. While Munch worked (and re-worked) until her "frosting" was thin enough, I molded the other ball into the base of a cupcake and used my clay tool (you can use a toothpick or butter knife) to give the wrapper its ridges.

5. This picture shows my "cupcake wrapper" just before it was completed.

6. I swirled Munchface's "frosting" onto the top of my wrapper (first ensure the frosting is secure by gently pressing it onto the center of the base). Meanwhile, Munch rolled a tiny ball for the black cherry topper (we also used sparkly beads as toppers for the other cupcakes).

7. Shows our mini cupcake ready for baking.  Use a large safety pin to push a hole all the way through the cupcake.  This will allow the cupcake to be a necklace charm.  Bake in the oven on 225 degrees for 15 minutes.

8.  Let it cool 10 minutes.

9.  Slide pendant "needle" (sold in jewelry making section of craft stores) through the hole.  Bend the end to prevent the cupcake from sliding off.

10.  Slide onto your ribbon or chain through the top of your *now* cupcake charm and enjoy your cute necklace. 

We'll make ours similar to this one (the bow, hello?!):


I used this technique to make these rings for a client's pinkalicious party last April:


I just love how affordable and easy polymer clay is to work with. Think about it, polymer cupcake jewelry is pricey!  Why spend that money when you can have fun making them yourself or with a friend.  Trust me, the rewards are NOT just monetary :)

I can't wait to find OTHER things to do with polymer clay!


Photobucket

Linking up:


The DIY Dreamer

Tuesday, March 27, 2012

Fill 'Er Up!

Dose of RANDOMness

... I have this dog... He's really cute... Great dog... Apparently, he's also a great pee-er.  So, we're considering letting him go (although we have another option we're going to try first)... Did I mention he's 5 lbs of PURE muscle man?  Well, he is... AND he's cute. Like, really cute.


What does this have to do with the Easter baskets?

Well, Munchface loves the dog but said if she gets a hamster, she'll be OK with pee puppy leaving.  Although we might not get rid of pee puppy, I think Hubbs is seriously considering a guinea pig for Easter... which would TOTALLY sabotage(drama, I know) my Easter basket plans!

What are those basket filler plans, you ask?  I do for Munchface what my mom did for us - buy 1 or 2 GIFTS that just happen to be placed in a basket.  None of this ready-made $20 basket o' junk for us, lol.  My mom makes the best baskets and she STILL makes all of us (in our grown-up lives) Easter baskets... Anyways, following my mom's style, we've gotten Munch everything from dolls and movies to Summer clothes and books in previous years.  

Check out some of my gift ideas:

Custom Placemat


Aren't they all o-so adorable? I mean, seriously. Munchface has a $2 walmart placemat that we've been using to protect my dining room table (daily dinners, crafts, baking, homework).  We use it often enough that I'd like to have 1 reserved for FOOD and the other for craft/class projects.  Would you like to see more personalized placements? Click here.

Name Necklace

Something about this little sterling silver necklace just makes me smile. Munch is at the stage where she loves to wear her "jewels!" Isn't it adorbs?
$29 and it's Sterling Silver!!


IKEA Greenhouse

Maybe I'll scratch the whole basket idea and get her a small greenhouse.  She's been begging me to plant flowers outside and... Uh... That's just not my thing so... Maybe I'll buy dirt (that I know doesn't have bugs) to plant flowers and herbs that will grow indoors (where I know I'll water them without bugs).  It's also something daddy we can do together. I can almost see how I'll package it - cool glasses, little gardening gloves, Easter grass at the bottom, with cute little pots (that we can paint), a pretty little bow and maybe a pennant banner with her name(?) and daddy can help her plant the seeds in the nasty dirt - she can grow all kinds of things! PLUS, Ikea makes this adorable greenhouse:
  
$19!

I always add stickers, lip gloss and hand sanitizer as filler but I think she'd love any of the above gifts for Easter.

 .
.
.

What about you?

What do you plan to give your little ones for Easter?
Photobucket

Monday, March 26, 2012

Basket Case: Affordable Easter Baskets

You may recall my Christmas post where I told you about amazing deals I found on walmart.com. Let me say for the 10th time that I was so impressed with our personalized knit stockings I made a mental note to check walmart.com for future holiday items.

Seriously, check out the stockings; they're the cutest:


The stockings were only $19 (with free shipping and personalization) - almost half-off the PBK price.  With Easter around the corner, here are a few fabulous walmart.com baskets deals.

Pottery Barn Baskets

I have a weakness for personalization.  Add my name on something and it instantly becomes SPECIAL.  The first place that came to mind to purchase Munchface's personalized Easter basket was Pottery Barn Kids (PBK). PBK baskets range in price from $14 - $46(because they sell basket liners and baskets separately) with $7 added for personalization. Don't get me wrong, they are gorgeous...


...and I was prepared to justify the splurge by claiming we'll use it every year.  THEN, I thought back to Christmas and found baskets (with FREE personalization) on walmart.com.

Walmart Baskets

$14

$19.95

$12.98

$19

All include free personalization and can be delivered for free to your neighborhood Walmart. I just can't decide which one to order! 

Plus, I found these 2 baskets on http://www.personalcreations.com/ and I really heart them:

$14
 
$25
 
Aren't they all adorable?! 

In summary, I think before I have to justify pay the PBK price, I'll consider the tried-and-true alternatives on walmart.com and spend our money on making the day special!

I'll keep you posted on the basket's contents! We aren't ones for a lot of candy so I'm ordering other personalized items that I am so excited about. 

Feel free to share your Easter basket choices in the comments section!

Photobucket

Linking up:


Friday, March 23, 2012

Elmo's World: The Wrap-Up

Today is the FINAL Elmo's World post (I think) and, while I'm excited to tell you all about it, I have a confession.  I worked hard on so many DIY elements and had so much going on and was so excited to take quality pics and... Well, guess what?

I FORGOT MY FABULOUS FANCY CAMERA MEMORY CARD!!!

Can you believe it? Battery - charged. READY. SET. CLICK. and nothing. WHAT IN THE name of Elmo's WORLD? Yep. No memory card so I have no awesome-fantastic, bright and cheery photos... Just Instagram iPhone pics. 

Don't get me wrong, I'm VERY grateful for the technology and quality cell phone cameras now offer but nothing compares to the good ol' camera, ya dig?

I hope you're not like me and expecting top-quality images... AND if you are, MY BAD! We're embracing the imperfections, remember? Here goes...

The food table backdrop.  We taped Elmo balloons to the wall to create an Elmo wall. I had planned on a wall of multi-colored balloons but I realized we wouldn't have the air to blow up the 50 kajillion I was planning for.  I framed the Elmo balloons with streamer "stripes" from floor to ceiling.  We then used my scrap book hole puncher to create card stock polka dots.  It made for a quick and easy backdrop!


The Sweets! I set-up a small dessert display with Elmo cookies (they were like mini cakes), the birthday cake, cupcakes and the sweet smash cake.  I chose marshmallow fondant for the birthday cake and coordinating butter cream icing  for the smash cake - both were YUM! 
I didn't get a pic before the cupcakes were picked over, lol.


The Scribble Table.  First, we put on the plastic tablecloths, then we used a roll of easel paper to line the table.  Add the crayons and you've got another easy activity for the kiddos...  After an hour of having a blast in the soft play area, this provided an opportunity to wind down, eat some yummies and scribble quietly until the dance competition started. 

We also placed party hats, favor bags(filled with an Elmo storybook, goldfish and crayons) at each place setting.  Bright and cheery, don't ya think?


The Elmo Backdrop.  Click here for the tutorial and more information on the backdrop.

It made for the perfect background to the dance contest and games:

He was swimming, lol!
Of course the birthday song was the highlight for me.  There's just something about first birthdays that makes the birthday song so magical... Half of my bittersweet excitement is for parents realizing the days of babyhood are almost over and the other for the new milestones to expect in coming years... It's truly a heartfelt moment I always enjoy...
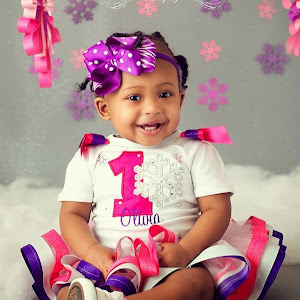
Baby Nina really enjoyed it too! 


It was her first taste of cake...


...and she LOVED every bit of it :)


Projects you DON'T see? The head shot backdrop (for Elmo photos of the kiddos) and the tissue poms we made to hang over the scribble table.  While both were fabulous, Nina's mommy forgot them in her other car's trunk :/ Here's a sneak of what the backdrop looked like before it was all done (made with party streamers and poster board):


The planner in me was bummed but, islanders, we've discussed this...NO STRESSING!!  So, o well! I think it was an adorable little party withOUT the poms and backdrop, anyway :)

Photobucket

Life Update - Divorce.

In my last post, I mentioned it's been 6 years since I last blogged and this particular life update is one of the reasons I buried my he...

© Shipwrecked on Fabulous Island. Made with love by The Dutch Lady Designs.